
Just before Christmas I shared the reveal of our new dining room - it still had some finishing and styling left to do, but by the most part it was done. I shared the unveiling of our gorgeous victorian cupboard doors which had been locked away behind a giant white glossy board (oh so stylish!), but if you noticed - the inside was horrendously hideous. Half of it filled to the brim with rubbish, it dusty and bleh. I wanted to do something a bit fun to the inside of the cupboard, I wanted to add a good splash of colour. Something that popped against the grey. I wanted it to go full-blown YELLOW.
Here's the cupboard as it was after it had been cleared out. Well, the top half at least! The inside of the doors still needed a second coat of paint and the whole thing just looked tired and lifeless. Bit of a stupid thing to say about a cupboard - but you know what I mean, right?! 
After a good clear out and clean up, it was ready for paint. The shelves in here are 100% retro with this original (presumably) vintage wallpaper, surprisingly in really good condition. It's not my usual kind of design however I really like the idea of keeping a part of the previous owner in the house, and especially a previous owner that lived here for almost sixty years!! Edna clearly loved this house, it had been well looked after (in every way, including this wallpaper!) and so I felt like it would be a true shame to go ripping it out. I did however ask Instagram how they felt about this design and it 60/40 on the Hate V Love. So I'm definitely going against the opinion on Instagram for this one. (Possibly a first?!) 
So as I say, those are staying! As for the walls, my initial intention was to buy some yellow paint and gradually add some white paint to it, to create different shades between each section/shelf. I think this would have looked awesome and I totally plan on doing this idea elsewhere in the house some other time, but I actually realised a more cost-effective idea was to use up some sample paints I had leftover. We have quite a lot of them now and I was pretty sure one tester would be more than enough to do each section. 
So whilst I say "use up" I actually only had two of these testers and then I bought an additional two to have a full set of four different yellows. One for each section. From left to right there's Citron, Yellow Ground, Barbouche and Sudbury Yellow (my personal fave!). I sampled each one on a bit of paper to decide how exactly I should order them. And to be honest, some of the shades are reeaaaally similar, so it was pretty tricky. 
You see what I mean?! I still wanted to go dark to light, but with shades so similar it wasn't quite what I had imagined. After a first coat in the top couple of sections I was somewhat worried my yellow idea was in fact, a bad shout. Let's just say, it was looking a little weak and definitely not the dark to light gradient idea I had in mind... 
However I perserveed with the idea (no going back really, is there?!) and after two coats it was all beginning to come together. That 'pop' I wanted was totally there! It looked jazzy, fun and fresh. It looked awesome. 


Is it calling to you yet? Well if not, here's the finished cupboard in all its yellow-y goodness. I absolutely love love love (one more time... love!) it and the retro wallpaper with the yellow totally works as well. The design of it isn't my usual cup of tea at all but somehow I really think it goes. It doesn't look dated or retro, it just adds to the fun and looks right at home. 


Colour from Top to Bottom: Sudbury Yellow, Barbouche, Citron, Yellow Ground. (All Farrow and Ball) The pink flowers are definitely making me feel like the cupboard needs a splash of pink in there too. Oh and if you're wondering 'what about the bottom bit of cupboard' well, all I can say is - it's still filled with stuff and it's more than likely going to stay that way for quite a while. It's all DIY-related stuff in there that we're going to be needing fairly soon, so until then - no yellow down there I'm afraid! The plan for the top yellow-y bit is to use the top two shelves for paper storage (they're way too high to reach anyway!) which will be neatly stored in vintage stackable suitcases. We'll then add a plug socket to the cupboard, store the printer, our laptops and all the home hub type stuff too, like the router and the home telephone etc. So right now I'm on the search for some vintage suitcases, some wire baskets and other quirky ways of storing a whole load of boring important documents. I'll have to keep you updated on all that later, as eBay is very much just a waiting game. But for now, I've already begun organising and here's how it's looking so far... 
And to give you a bit more perspective - here's how it looks with the whole room. The plan isn't to keep the cupboard open 24/7 but it's one of those things that ends up getting left open, so when that happens - now it'll add something to the room, rather than taking away from it and just look *cluttered*.

I'd love to know what you think? Does the pop of yellow work for you? Or is it a little too bold? from http://www.kezzabeth.co.uk/2018/01/a-very-yellow-cupboard-makeover.html
0 Comments
Fear. It’s one of those things we all struggle with. Whether it’s the fear that overcomes you when your sneaky children hide a fake mouse in the house and you stubble upon it (that actually happened last week — and I screamed)… or the fear that comes with flying halfway around the world to meet your daughter for the first time. (Which you can hear about our Adoption Journey here, here and here!) Fear is a real thing. A very real thing.Where does it come from? My children have always been fearful of certain things… but it’s not like I taught them to be afraid, they just are. Our fears evolve as we age and change, but isn’t it crazy that we all have different fears? What makes you fearful, may be something that doesn’t fear me. And vice versa. If you’ve been following along for any period of time you know that my husband and I uprooted our entire life and moved South to Nashville. While it may seem fun and exciting to build a new house, move to a new city that checks the boxes of “hip and cool” … it’s also quite possibly one of the most terrifying things we’ve taken on. A few weeks after we moved to Tennessee and were in the THICK of the unknown I started a list on my notes app on my phone of all the little miracles or ways I was seeing God show up, even among all the unknown. It was my way of counting my blessings, calming my fears and reminding myself that fear does not come from God. Overcoming fear one step at a time.Since our move, I’ve been searching for some ideas and advice on overcoming fears and worries. Something happens when everything you’ve ever known is not your normal anymore and fear comes in full force! What is the root of fear? Why am I experiencing so many new fears? What does fear look like in my kid’s life? You might remember back when I shared about the book from my friend Alli Worthington, Breaking Busy. The theme of doing less overtook much of my 2016 and even 2017… until we moved. And then, the crazy came on… and so did the fear. Fear of what if my kids fall apart when we leave the only home they’ve ever known. Fear of what if moving is too stressful on my marriage. Fear of what if we hate the new neighborhood we move to. Fear of not finding our community of people that we can do life with. Fear of missing my parents who we’ve always lived a hop, skip and a jump from. Fierce FaithAlli is back at it again inserting the perfect book for my current season of life, Fierce Faith.
This no-nonsense, wise advice will encourage you and show you exactly how to cut through the daily clutter of fear and worry to reconnect with your own fierce faith. Fierce Faith is a manual on how to overcome the worries that hold you back. You will: +Identify fear-based thinking and know how to finally stop it. +Overcome the big and little worries in life. +Learn a simple trick to stop the anxiety spiral. +Live a more confident, less worried life.
Lucky for me, I got a sneak preview of what all is included in this book, and it’s been a huge part of unraveling my fears and worries after settling into Nashville. I’m so thrilled to share Alli’s newest book with you because I think it’s something we can all, no matter what stage of life we are in, relate to. Sometimes the best attack against fear is just knowing you’re not alone, right?!?! Which is why I love that her book brings fear to light… so we can all face the things that hold us back from being who we truly are. You can get your copy of Fierce Faith here! SaveSave SaveSave SaveSave SaveSave SaveSave SaveSave SaveSave SaveSave SaveSave SaveSave SaveSave SaveSave SaveSave SaveSave from http://houseofroseblog.com/fierce-faith/ 
It's January. The month where we're all paying off those credit cards from Christmas and wishing we hadn't spent so much on food when half of it ended up as waste. Bank accounts are empty and for one reason or another, money is always tight in January. When renovating you can't exactly commit to "no spend" months, and cutting down on spending in general is easier said than done. If you need plasterboard, you need plasterboard. A renovation will cost money and there's no getting around that. You basically need to always be in supply of cash. But, there are still ways you can save and even make money on a home renovation project. So I thought I would share some of the ways you can make your money go further.
REUSE, REPURPOSE, UPCYCLE
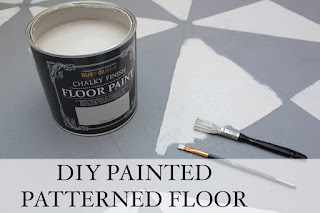
This is probably the most obvious trick in the book, but I couldn't not mention it, could I? Making a few updates and changes to old items can really bring a new lease of life to them. In a renovation, people often have a tendency to remove and get rid of absolutely everything. From old built-ins to floorboards and even bigger stuff like entire bathrooms. Whilst this stuff may not be to your taste, you can in fact reuse and repurpose items from your renovation, turning them into something else. Floorboards for example are great for shelving or they could even be turned into a bespoke top for a dining table. You can also transform existing fixtures and fittings too. If you have ugly built-in wardrobes lacking a bit of 'something'; instead of completely ripping them out, consider adding some new mouldings, handles and a lick of paint. You'd be surprised what a few alterations can actually achieve! Check out our DIY painted floor as an example - who knew concrete could look so good? Upcycling and repurposing can even become a business venture, just take a browse on Etsy and you'll find all kinds of upcycled ingenuities. Buying handmade items is back in fashion and the web is literally full of amazing inspiration for how to reuse and repurpose. Bathtub as a planter, anyone?! Before you chuck stuff away or think it's time to "get rid" I recommend a quick google of alternative ideas and you may well soon change your mind. 
BUILDERS BAY - RENOVATE FOR LESS
DIY and renovation waste is massive in the UK. As I already mentioned, so many people literally throw away everything whilst renovating. Skirting boards, old kitchens or even bathtubs - it all goes into a skip. And what about those leftover sheets of plasterboard, extra roll of underlay or pack of tiles? Yep, usually not worth keeping and gets chucked right into a skip. It makes us, as renovators massively wasteful and causing a heck lot of waste head to landfill. But that doesn't have to be the case. Builders Bay is an online marketplace specifically designed for the buying and selling of DIY materials in order to tackle this massive DIY/Renovation waste problem. The idea is that instead of chucking away perfectly decent re-usable DIY waste, it can be listed online and reused instead. That means not only can you sell leftover or unwanted materials and make money(!!) but you can find materials at great prices too. Builders Bay has a whole catalogue of items which you can search through and organise to see what's nearest to you. All these items however, are specific for DIY and Renovations. Things like windows (often just made to the wrong size), to ex-display kitchens and bathrooms, unused tiles, secondhand doors, fences, tools and more. It even has a 'salvage' section (my personal fave!) for vintage/reclamation lovers as well. Basically anything and everything you might use within a home renovation project for a lot less than the cost of buying it brand new from a retailer. But it's not just the 'finishing items' for sale. As I say, you can sell and buy leftover materials like cement, skirting and plasterboard too. You might be thinking "no one wants to buy this kind of stuff" but you'd be really really surprised. People love buying scrap wood to turn into kindling, small sheets of plasterboard, (perfect for a small shed renovation!) and even just odd bags of concrete or paving slabs to build a log shed on-top of. Everything can be reused and even if you think it's waste, someone out there may not. It helps to reduce waste, help the environment and of course you get a bit of extra cash at the same time. If something can be reused, it should be! BORROW BEFORE YOU BUY! Borrowing tools is a brilliant way to save money. Buying (or even hiring!) tools can be so freaking expensive and you'd be surprised how many people, even non-DIYers(!) have random tools stashed away in a shed or garage. If you're in need of a specific tool, just ask friends, colleagues or neighbours if they have one first. After all - if you don't ask, you don't get! We've borrowed wet tile cutters, circular saws and angle grinders saving us heaps on hire and buying costs. And we've also leant a few tools out too :) Sharing is caring, after all. But borrowing tools now goes further than that. With sites like Rent My Items you can find normal local folk lending out their tools for considerably less than tool hire companies. It's a great way to hire out tools cheaply and of course you can lend your own tools out too. Yep you read that right - you can hire out your own tools and make money! I mean if 'Borrow My Doggy' is an actual thing, then why wouldn't there be one for tools too? In fact, I'm kind of wondering why I didn't think of this business venture myself!! 
TAKE DIY COURSES
Do you need a full re-plaster job throughout your home? Or how about you're updating the bathroom and the pipes are now in all the wrong locations? Or perhaps you're even looking to re-tile the hall? The cost of a tradesman does not come cheap and you can often pay to learn new skills yourself for less than it costs to employ an already skilled trades-guy. Yes, seriously.
Learning to DIY can really save you so much money, especially if your home needs a lot of work in that particular skill. Of course, you need to be prepared to practise lots and accept that your skills may not quite match up to those of a professional. You may have to add a bit of filler to your plastered wall and it may well take double the time to do. But, for the money you'll save, I personally think it's so worth it. And of course, the more you do it - the better you'll get. And who knows, you could discover your true calling in life and your skills may well be a complete match for that of a skilled tradesperson. You'll also be surprised how many friends and family will be after your services as well, and even potentially offering up a bit of cash (or even just a good pint of beer!) as reward for your hard work. It's a great way to make a bit of money on the side and you could even begin to sell your services as a part-time job. We personally invested on taking a DIY plastering course, which has already been very useful and saved us a massive wad! 
DO NON-SKILLED WORK YOURSELF So maybe the serious DIY stuff isn't for you - that's totally okay and you can still save money in other ways with doing the non-skilled DIY stuff too. What am I talking about? Well you can still save money by just paying for half a job and doing the other half yourself. Jobs like pulling up carpets, removing skirting boards or taking down ceilings are a good example of this. There's absolutely no skill in these kind of jobs and whilst some of them may not save you a fortune (removing carpets!) others will actually save you quite a lot. Pulling a ceiling down for example is quite a time-consuming mucky job and will easily save you a whole day of labour cost. The same goes for stripping wallpaper, removing plaster, pulling old tiles off the walls and basically doing any kind of demolition work yourself. Obviously it'll be dirty and horrible work - but no pain, no gain right? You may even find it strangely therapeutic. I mean, Kirsty Allsopp doesn't love the Sledgehammer just for opening up room space, does she?! ;) 
AVOID DELIVERIES (LIKE THE PLAGUE!) Some delivery costs are just ridiculous. Wickes will charge you a small fortune for ordering even just a few bags of mortar, or just one single length of plasterboard. Other companies only offer free delivery with orders over 3-digit figures and if you're not careful you can end up spending those 3-figures on just a few deliveries. That's money that could go back into your renovation and pay for some serious stuff. Extortionate delivery costs are usually the main thing that puts me off buying from a certain shop/retailer, but luckily there is still a way around it. If you can, I highly recommend hiring out a van and going to collect the materials yourself. This only really pays off if you're buying from multiple stores at once and it's not too long distance. But better still - another alternative it to try and squish it into your own car. There's very little we haven't been able to fit into our car during our renovation (and our car is actually tiny) and you'll find most things are sold different sizes. Whilst typically you see plasterboard as giant size pieces of board they do come in smaller sizes too. And if you don't want to destroy your nice new car, consider purchasing a super cheap 'DIY car'. Ours cost just £350 and we have none of the guilt from ruining the interior. It's saved us an actual fortune in the long run and it's been so so useful - and surprisingly rather reliable too! DITCH THE SKIP Skips are so expensive. Another 3-digit figure you can totally live without. Ditch the skip and move your renovation waste yourself! It's the only way we personally handle our waste and obviously that DIY car is very useful here too! If you commit to do a bit every night, it'll soon be gone and you could maybe even rope in a few friends to help. Dealing with your own waste not only saves you a heck of money but it also makes you seriously consider what you're chucking away. Could it be resold on Builders Bay? Or even potentially listed to be given away for free? We've personally used this approach to get rid of hundreds of bricks. No skip required, no trips to the recycling yard - We just listed them as freebies and soon enough people were rolling up to bag themselves a few. One man's rubbish, is another man's treasure as they say! Sadly rubble isn't so easy to get rid of, even as a freebie - but you can buy giant buckets to fill up and take to the recycling yard this way. Again, this is something we've always done and is saving us an absolute fortune. When it's so free to do, why wouldn't you?! Do bare in mind that recycling centres aren't really meant to take trade waste, so if you do have a builder on site, strictly speaking you do need a skip (and I'm pretty sure he wont want to be working under a foot of rubbish!) but if you can do it this way, then I thoroughly recommend you do! COMMUNITY REPAINT Community RePaint is a brilliant way to save money and get yourself free paint. Sadly not every county operates one of these schemes and all counties have different rules, but for us in Nottinghamshire it works pretty simply. Basically, people dispose of their half-used paint at the recycling centre and instead of the recycling centre disposing of all this paint, its re-distributed back out into the community. Most of it goes to schools, public groups and charities, and then every few months "public paint days" are held, so you can also get your hands on free paint too. It's ingenious! It's so much better for the environment and it promotes the environmentally friendly idea of reusing and recycling. You might be envisioning tins of dried up manky paint that's potentially separated into four different shades, but you'd be SO surprised at what people chuck away. Even unopened paint ends up there! OK so you might get a few bad eggs but by the majority, most of it is just fine! In the past we've used fence paint, decking paint and standard white paint from the Community Repaint scheme. And it's all free! An absolutely great way to save money. I've written more about this scheme in detail which you can read here - but I absolutely recommend it to everyone. 
FIND FREEBIES Continuing on the freebie wagon - look out for them, they're everywhere! From freebies being offered up on facebook to signs up outside houses, or even potentially fishing out freebies from local skips (always ask permission first!!). You can find all kinds of amazing stuff all over the place. Last year I saved FOUR Victorian fireplaces from entering a skip, just by total chance of being in the right place at the right time. I was really lucky, but this kind of stuff is sadly chucked away all the time. If you look out for it, you'll find it. If you don't consider yourself to be lucky enough to simply stumble across a few freebies, then I totally recommend checking out Freecycle to find stuff near you. People who don't want the hassle of selling or disposing of stuff will often give away items for free. Our old neighbour who decided to move and downside gave away a whole load of stuff via our local group. From old dishwashers to tables, books and a whole lot more. Definitely a place to keep a regular check up on!
CLAIM CASHBACK AND SAVE £££
I never really understood how these cashback sites worked a few years back, but ever since I've gotten into it, I'm addicted. Renovating a home means we're constantly buying stuff. By the hundreds! Cashback is just incredible. For every penny you spend, you get a certain amount back. It's a brilliant way to save and make money. I personally use Quidco which works with Wickes, Screwfix, B&Q and a few other DIY/Trade places too. But of course it also works with stuff like supermarkets, high street clothing, interior shops and even electrical places too. The way it works is simple. Instead of heading to google to find the shop you're after - head to Quidco. By clicking on the link through the Quidco website (as opposed to Google) you'll automatically gain cash back. If you commit to entering websites via the cashback platform religiously, you can really save a heck load of money. I've been using it for about a year and I've already gained £150 worth of money that can be paid straight back into my bank account. If you're a tad forgetful (yes that's me too!) well don't worry because you can install an add-on to your PC/Laptop which will notify you every time you're on a website that allows you to gain Cashback. It'll prompt you to head over to Quidco and re-enter the website, allowing you to gain that cash back. The more you buy, the more you save - and we all know renovations is all about spending money somewhere or other! I'd love to know any tips you have to share? We're constantly learning new ways to save and make money with our renovation and I'd love to hear if you have any other tips for us! *Collaborative Post from http://www.kezzabeth.co.uk/2018/01/how-to-save-and-make-money-on-home.html 
So I'm kickstarting 2018 by finishing some of those DIY jobs that are half-done - you know, when you start something all excitedly and then run out of steam and it just gets left. For an eternity. Yeah those kind of DIYs.
We started renovating the Conservatory waaaaay back in 2016 - we gave it a new roof, sorted the plumbing, added electric, we even plastered and insulated the external walls. It then took me a WHOLE YEAR to do the DIY Patterned floor (although in my defence it had become a room used for storage whilst we did the kitchen) and now another 6 months on from that, we're finishing the rest of the room off.
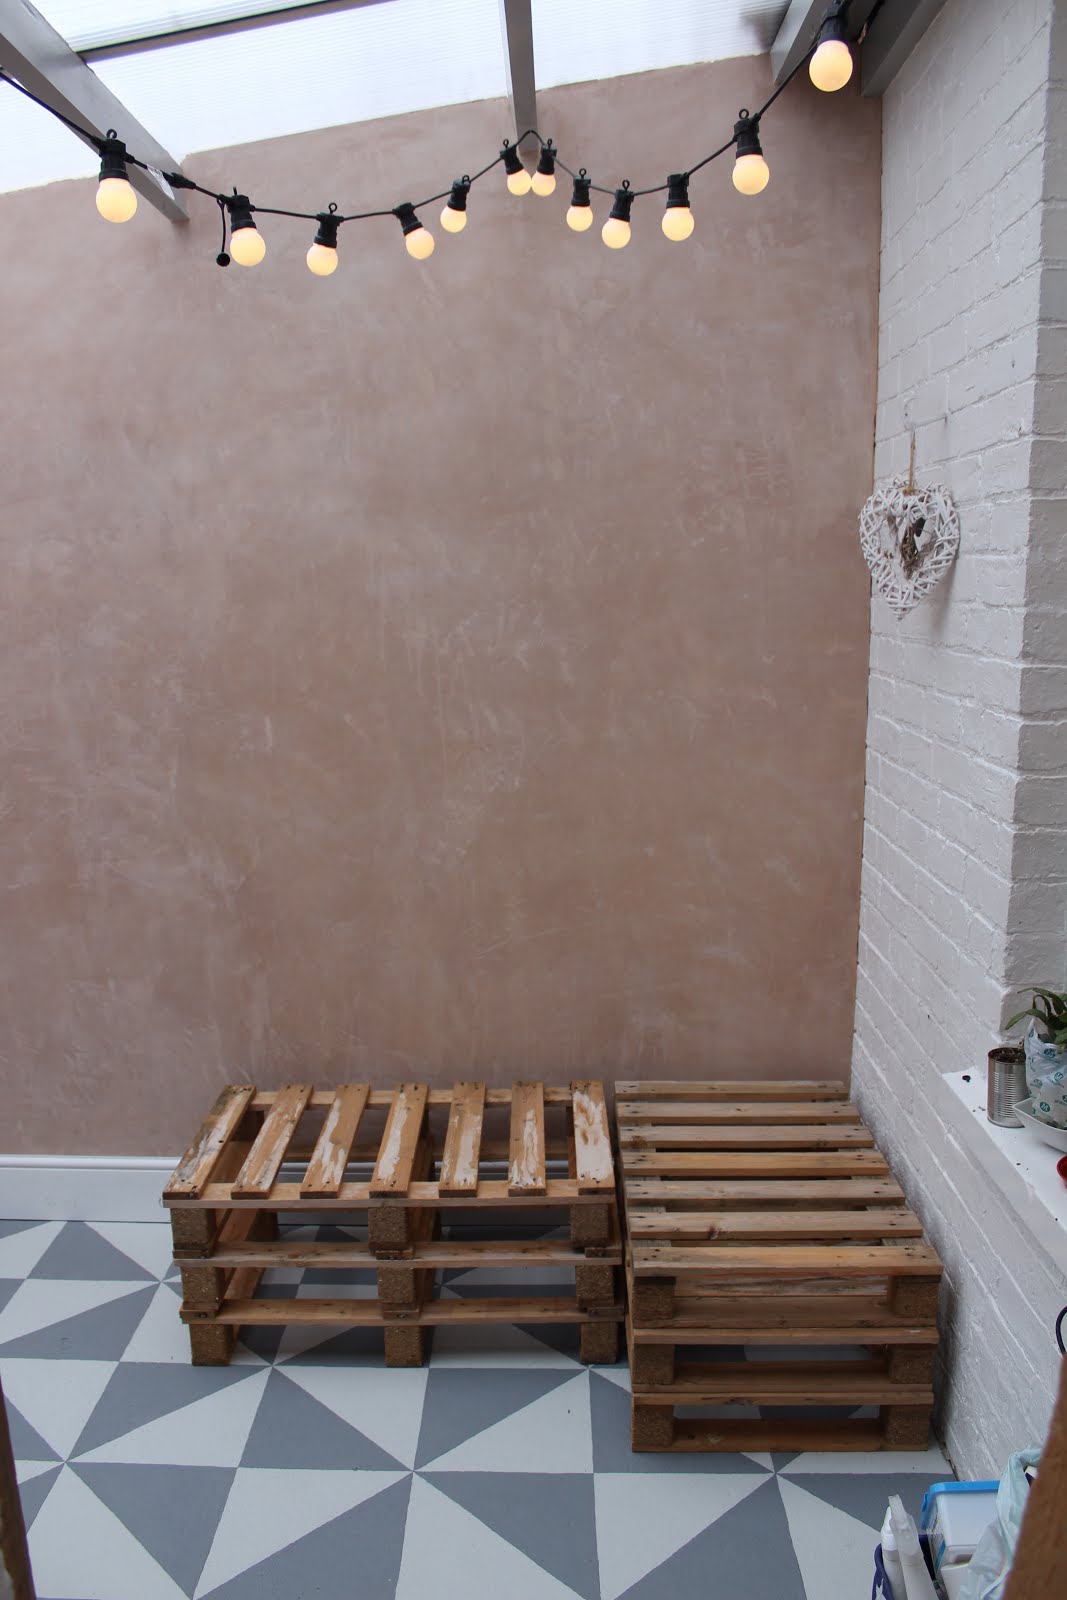
So that means no more raw plaster-coloured walls and it also means actually giving this room a purpose rather than just being four walls and not a lot else. I wrote about our plans for this room waaaay back here and whilst those plans have changed a little, I'm still planning on using it as a indoor/outdoor garden room filled with plants as a kind of summer snug, somewhere to chill out with a good book and garden view. Well once all that rubbish has been cleared at least!

The first job to finish in here is obviously painting that plastered wall and so it was the perfect opportunity to try and test out Valspar's colour-matching service, which I have been intrigued about for quite some time. If you don't know what this is - well in a nutshell, the Valspar paint range is so infinite that they can literally create any colour possible. Thanks to super awesome clever technology they can scan any colour and recreate it, as an exact match. So if you need to touch up some kitchen doors but don't have the paint for it - well, you can bring the door in and they can create the exact paint for it - genius! Or maybe you've seen an amazing colour in a magazine you want to recreate - now you can. No need to buy a bazillion testers or stand about comparing swatches to find the nearest match. Just a quick scan and it's all done for you.
The Valspar colour matching also works for creating colours from other brands too. You all know how much I love the colour range F&B paint offers but absolutely hate the price tag - well with Valspar you can get that colour for a considerably lower price. It's perfect for those of us on a budget and means we're no longer priced-out from having those colours.
I was really fortunate enough to be gifted some paint vouchers from the team at Valspar in order to put their paint to the test and so I finally had the perfect opportunity to try out their colour-matching service. How matching, was colour-matching? And does it really work? Well, I was about to find out.

First things first though - freshly plastered walls always need mist-coating even if they've been left to dry out for more than a year. I use a 50/50 mix of basic white emulsion (the cheapest one you can find works just fine!) and water. Once that's dry I then go back over with a 70/30 mix of Emulsion to water. And once that is dry - you can then go over with the actual coloured paint. If you forget to mist-coat new plaster then any paint (Valspar or other paint range) won't adhere properly and you risk it peeling right off.

So what actual colour emulsion have I gone for, you're wondering? Well, you'll be surprised to know that it is in fact NOT on the grey spectrum as I had always imagined, but PINK. Yep you read that right, we're going pink in the conservatory!

As much as I love grey (obviously!) it's slightly taking over our house. We have a grey kitchen, grey wall in the dining room, grey in the spare bedroom - hell, even our panelling in the bathroom is a blue-grey. It's everywhere! I absolutely love pops of colour, so I wanted to go for something with more colour, something different, something that compliments grey and would also make my plans for a ton of greenery in here pop against it. So I went for pink. A trendy, cool, grown-up kinda pink, one that doesn't look like it belongs next to a crib in a baby's room.


My initial thoughts upon opening the tub were very much "oh shit, have I made the wrong call here?" but once it started to go on the wall, I could totally see the exact sophisticated pink I had been after. The pink I colour-matched to is called 'Calamine' in the F&B range. It's not a baby pink or a sugary sweet pink, but one with a hint of grey. It's calming, cool toned and the exact grown-up version of pink I had been imagining. It also has quite an undertone of grey in it, which I think is probably what the reason this particular pink called to me so much.


Having never used any Valspar paint before, the thing that surprised me the most was how far one coat of paint went in regards to coverage. I was not expecting it to be so richly pigmented and if I had been a little more careful with application I truly think one coat would have been enough to do the whole wall. I've never used any other paint like it.


It's quite a bit thicker than actual F&B paint and from a 2.5L tub, I barely used a quarter of it for painting this wall. And as I say, I think I could have used even less if I had applied a little more carefully. I also went over the skirting board with it to give the whole wall seamless floor-to-ceiling drop backdrop of colour.


And you can already see just how great this colour looks against the floor! It compliments it so well, which I think has a lot to do with the grey undertones in the pink. If anything the pink wall makes the floor even more of a feature, which I freaking love and it totally deserves after the hours it took me to paint ;)

So the REAL question, is how matching was it with the actual F&B colour? Well, here's a little comparison and of course you can mind your own mind up for yourselves but I'm 100% certain it's pretty much as exact as you can get.

Needless to say I am really really impressed! If you have the fear of going colour-matching in case it's wrong - then don't be! I've been sharing the conservatory decorating over on Instagram (go follow me here!!) and had to many messages from fellow Instagrammers who said how much they love the Valspar colour-matching too and how much it's saved them not getting "the real deal" so to speak.
So here's a final quick look of the room with its new freshly painted pink wall. Of course I'll be doing a little more to this room still (pallet seating on the way!) but isn't it amazing how quickly paint can transform a room?


I'd love to know if you've tried Valspar's colour matching service out? And whether you were as impressed as me?
Products Featured:
*I was gifted Valspar's paint to feature in this blog. All words, thoughts and opinions are my own and as always, I only recommend products I would genuinely buy myself. Thanks for supporting the brands who support this blog :)
Similar Posts You Might Be Interested In:
from http://www.kezzabeth.co.uk/2018/01/colour-matching-with-valspar-paint.html 
After giving our little inner porch a lick of paint on the walls and some new Karndean flooring, the front door was crying out for a little bit of loving too. I like to refer to this door as the "not forever door" as quite frankly I hate it and with enough wishful thinking, I'm pretty sure we'll be able to replace it one day. It's not the style of it I hate, but the weird bulging glass panels. They're just awful. This house needs an original victorian style door for sure, but until I win some millions - It's got to stay. So I'm on a mission to make the front door look a little nicer and a paint of coat was exactly what it needed! 

As a quick-time makeover, I decided to use Chalk Paint for the job because quite frankly, it's the perfect paint for lazy DIYers! You don't need to sand anything back so it means you can achieve an instant transformation in basically, minutes. Chalk Paint may not be the most obvious choice when it comes to painting a door, but there's no reason not to use it! For a quick refresh, it's perfect.

I wanted to go for a pop of colour in here; something fun and vibrant - and after someone tagging me on an Instagram photo (I can't remember who you are - sorry!!) I thought mustardy yellow was the perfect colour. And even more perfect, because I already had a pot a paint ready to go (it was meant for another DIY project - but unfortunately that's had to wait!). 
The colour I'm using is Arles, which was very kindly gifted to me by the team at Annie Sloan. It's only a tester pot and it didn't *quite* do the whole door, so I did have to buy another, but it was very darn close! The only prep-work I had to do was to add some masking tape and give the door a quick clean as I went.

The paint went on super easy and one coat gave really really good coverage, especially considering it was a horrendous dark brown before. I've used different branded paints on other woodwork throughout the house and often had to do between 3-4 coats, so I was really impressed that I only needed two in this paint to get a full coverage of the mustardy yellow. In terms of paint pot size, this was about a tester pot and a half. I did paint onto a bit of the glass panels as well, just to cover up existing paint on there until I have the time to get the scraper out and scrape it all off. It's not really that noticeable though and barely picks up on the photos.


I then buffed in some wax, just to make the paint a little more durable. And that was it! Within just several hours the door had a total transformation. I love the pop of colour in our hallway now against that bright white and I think it goes really well with the floor too.


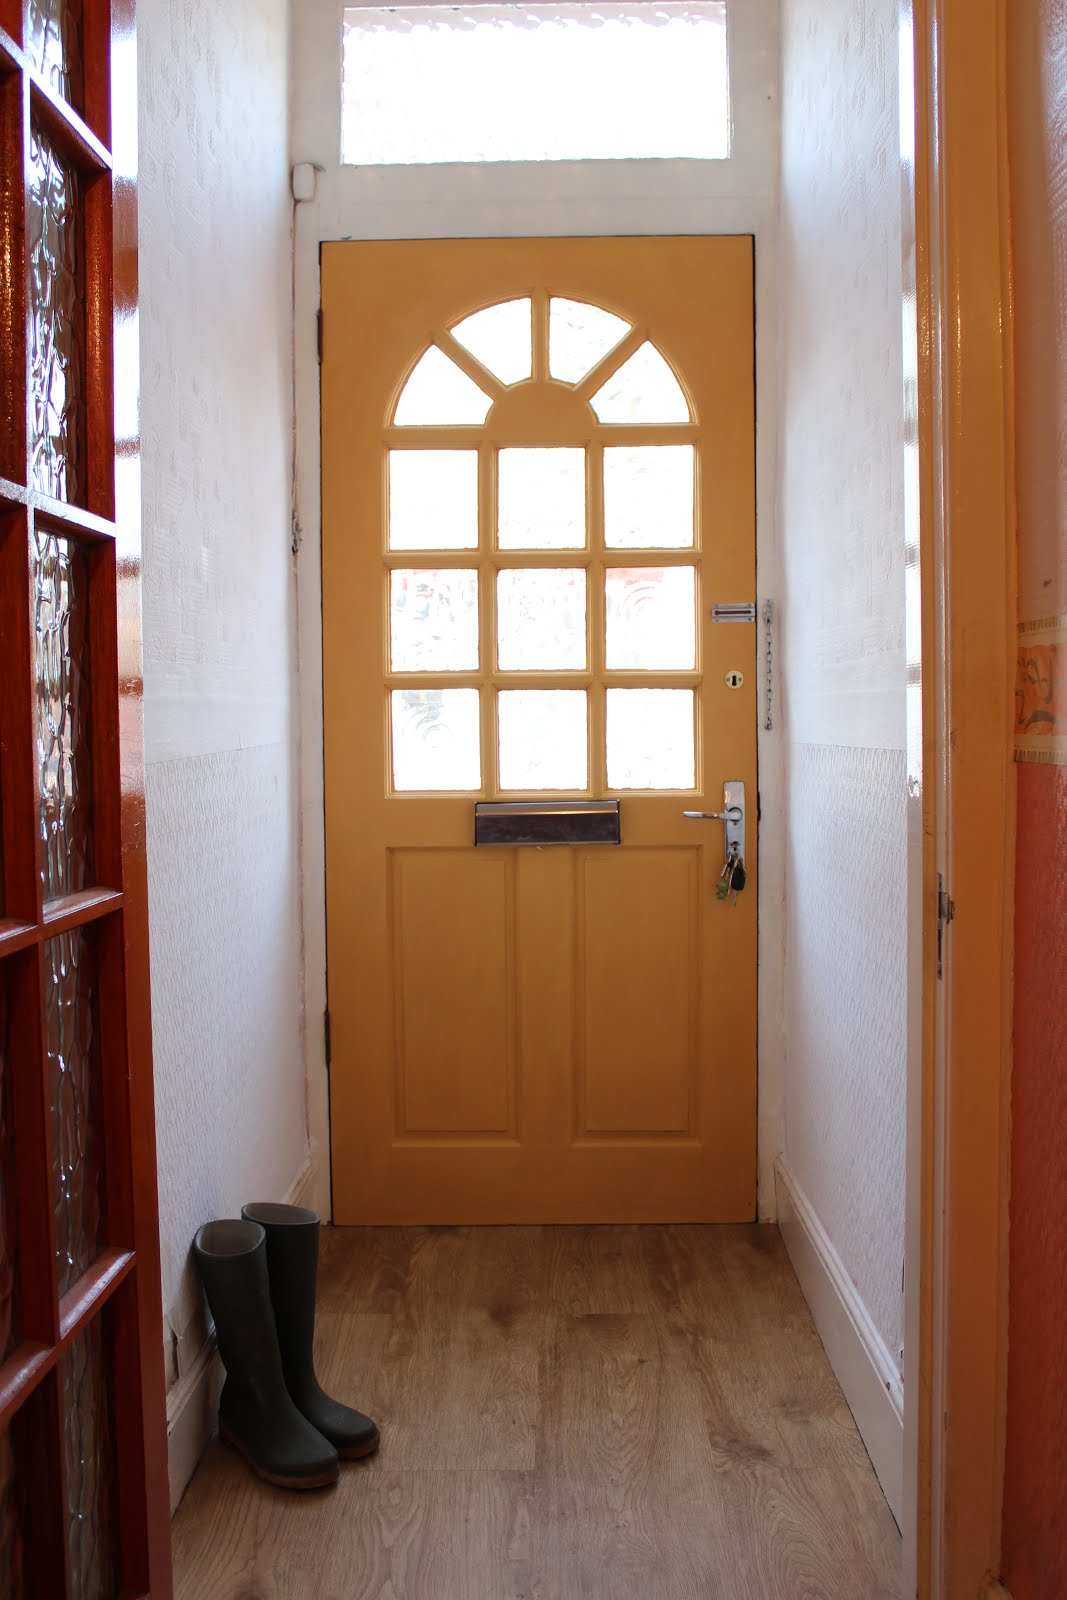
Obviously this room needs a lot of work still (spy the peeling wallpaper anywhere?! And flaky paint skirting?!) but it looks a darn sight better for now. And even if we get another door in the future - I'm definitely going for a popping colour! What do you think to my quick-transformation mustardy coloured door?
*Products in this post were gifted to me in return for a feature on Instagram. Thanks for supporting the brands that support this blog!
from http://www.kezzabeth.co.uk/2018/01/a-yellow-front-door.html 
Luckily for us our house has most of its skirting and original architrave in tact and whilst it's not always in the best condition, I'm really keen to preserve those features. Sure they're massively overpainted, you can see where old sockets have been attached and generally speaking they just don't have that crisp fresh new look. BUT that suits me just fine. I love a house that sings its age - rustic floors, repaired skirting boards, overpainted architrave (within reason) - it's all about telling a story as to how the house has lived and been lived in. However, whilst we have most of the original skirting boards in tact, some have been removed and replaced with non-matching ones and this seriously bugged me. With the floorboards sanded, tiling finished and kitchen installed, we figured it was about time we sorted out our skirting boards too. We've changed the layout of our downstairs quite a bit (three rooms into one!) so we obviously had areas where we were missing skirting boards as well. I was really keen to re-instate new skirting boards to the areas that needed them, but ones that matched the original ones so I didn't have to replace the whole lot. Here's a snap of the original boards, albeit it with them looking a little worse-for-wear.. 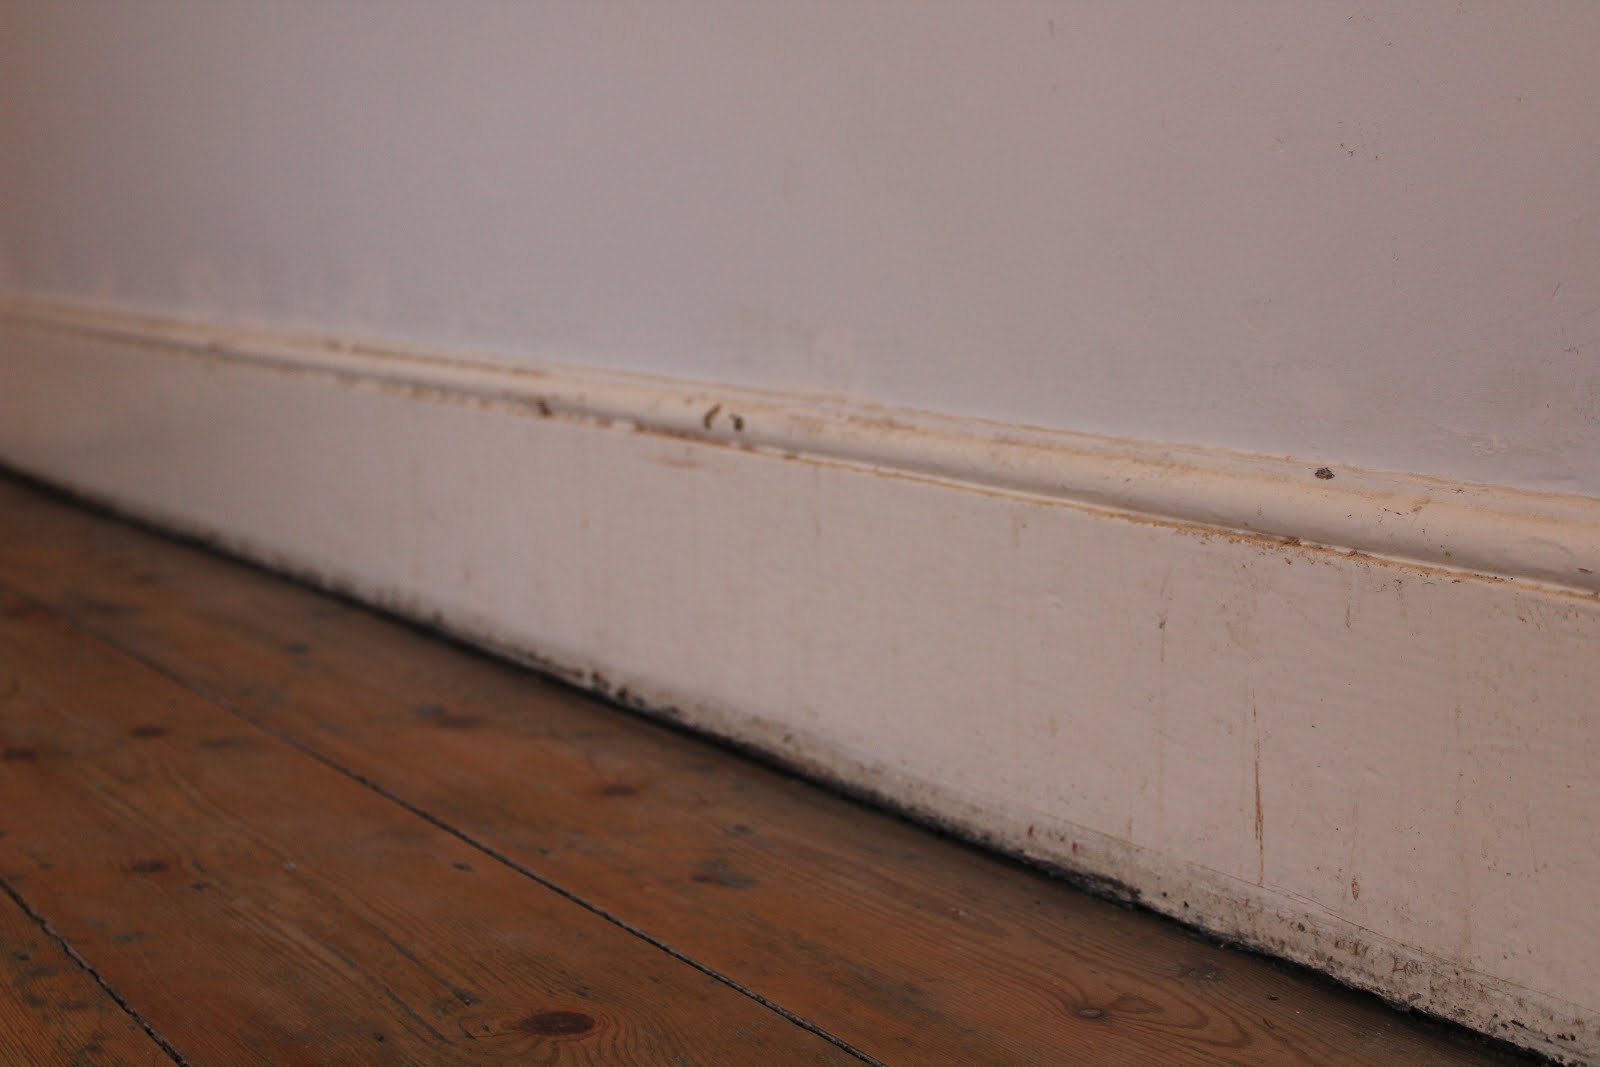
Matching old skirting boards for new ones is actually easier said than done as most DIY stores offer a very limited amount of profiles and only in a couple of different size/heights. Skirting World however, as their name suggests is a whole world of skirting and they have pretty much every kind of profile out there, with a total of over 50 different styles! That's a whole lotta skirting. And each one is sold in 12 different heights and 3 different thicknesses too. Basically if there's anywhere that will have a matching skirting board for your old ones, it's going to be here. We already matched some architrave last year for the kitchen from them (which you can read about here) and it was the first time we'd used MDF for woodwork as well.
Since then, I've been an MDF convert and I mean totally converted. No more bowed wood, twisted wood, warped wood, horrible knots - just a perfect length of board, every single time. It makes fitting so much easier as well. You don't have to pre-select the "best" piece of timber, nor do you have to try and reshape the timber whilst fitting - you know, hammering a load of nails into twisted wood in the hope of un-twisting it, and then of course splitting said piece of wood. Nightmare. We've bought a fair few packs of pine skirting board in the past - both in this house and our previous house and I can honestly said I've never bought a pack where every single board was perfect. Well, MDF is always perfect. Is it worth the extra cash? In my opinion, 100 times yes. So thankfully Skirting World did indeed have a matching skirting profile, at the right height and the right thickness too. Hurrah! We have the mini torus skirting, 170mm height and 15mm thick. If they don't already have a match for your skirting, then they can also make bespoke profiles to create an exact match as well - amazing! Here's a comparison of the old skirting agains the new skirting - I'm sure you'll be able to tell which is which - but it's pretty damn close match. 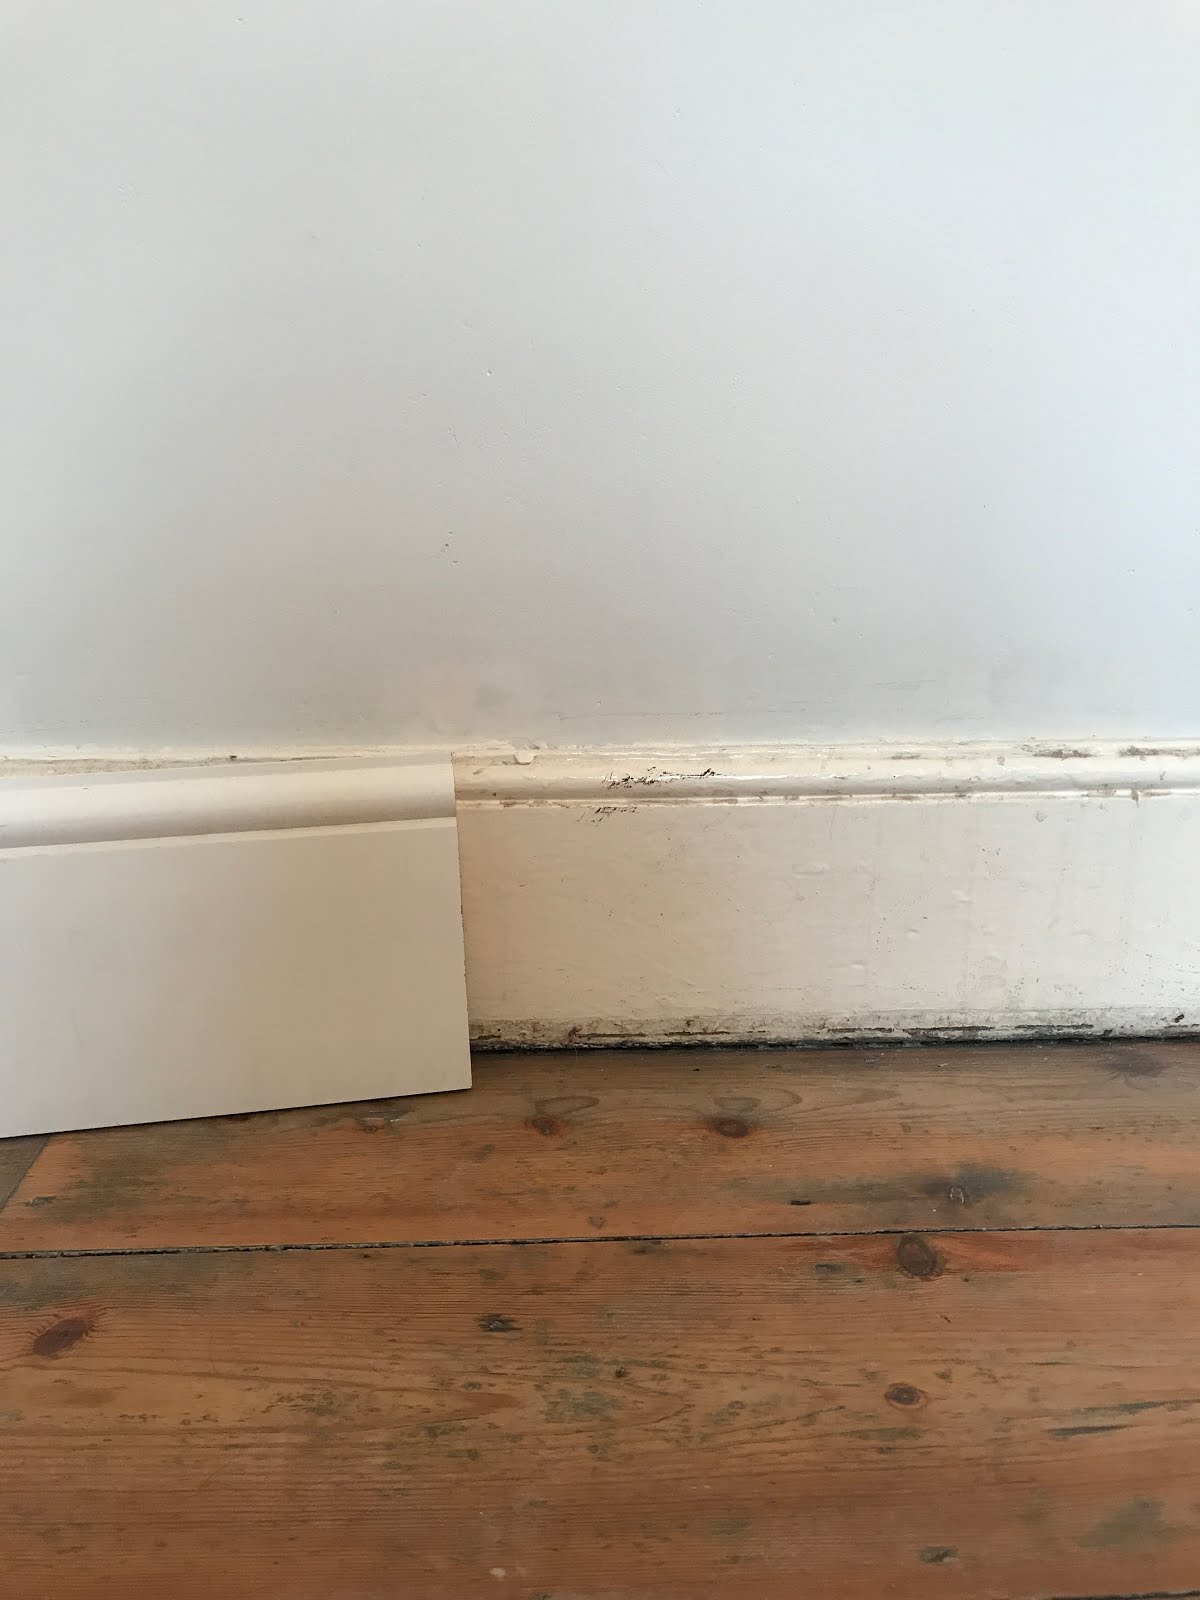
And here's a quick look at the not-so original mismatching skirting board we're placing as well. We actually think this length of skirting may actually be original, but the decorative top part has been sliced off - the horror! 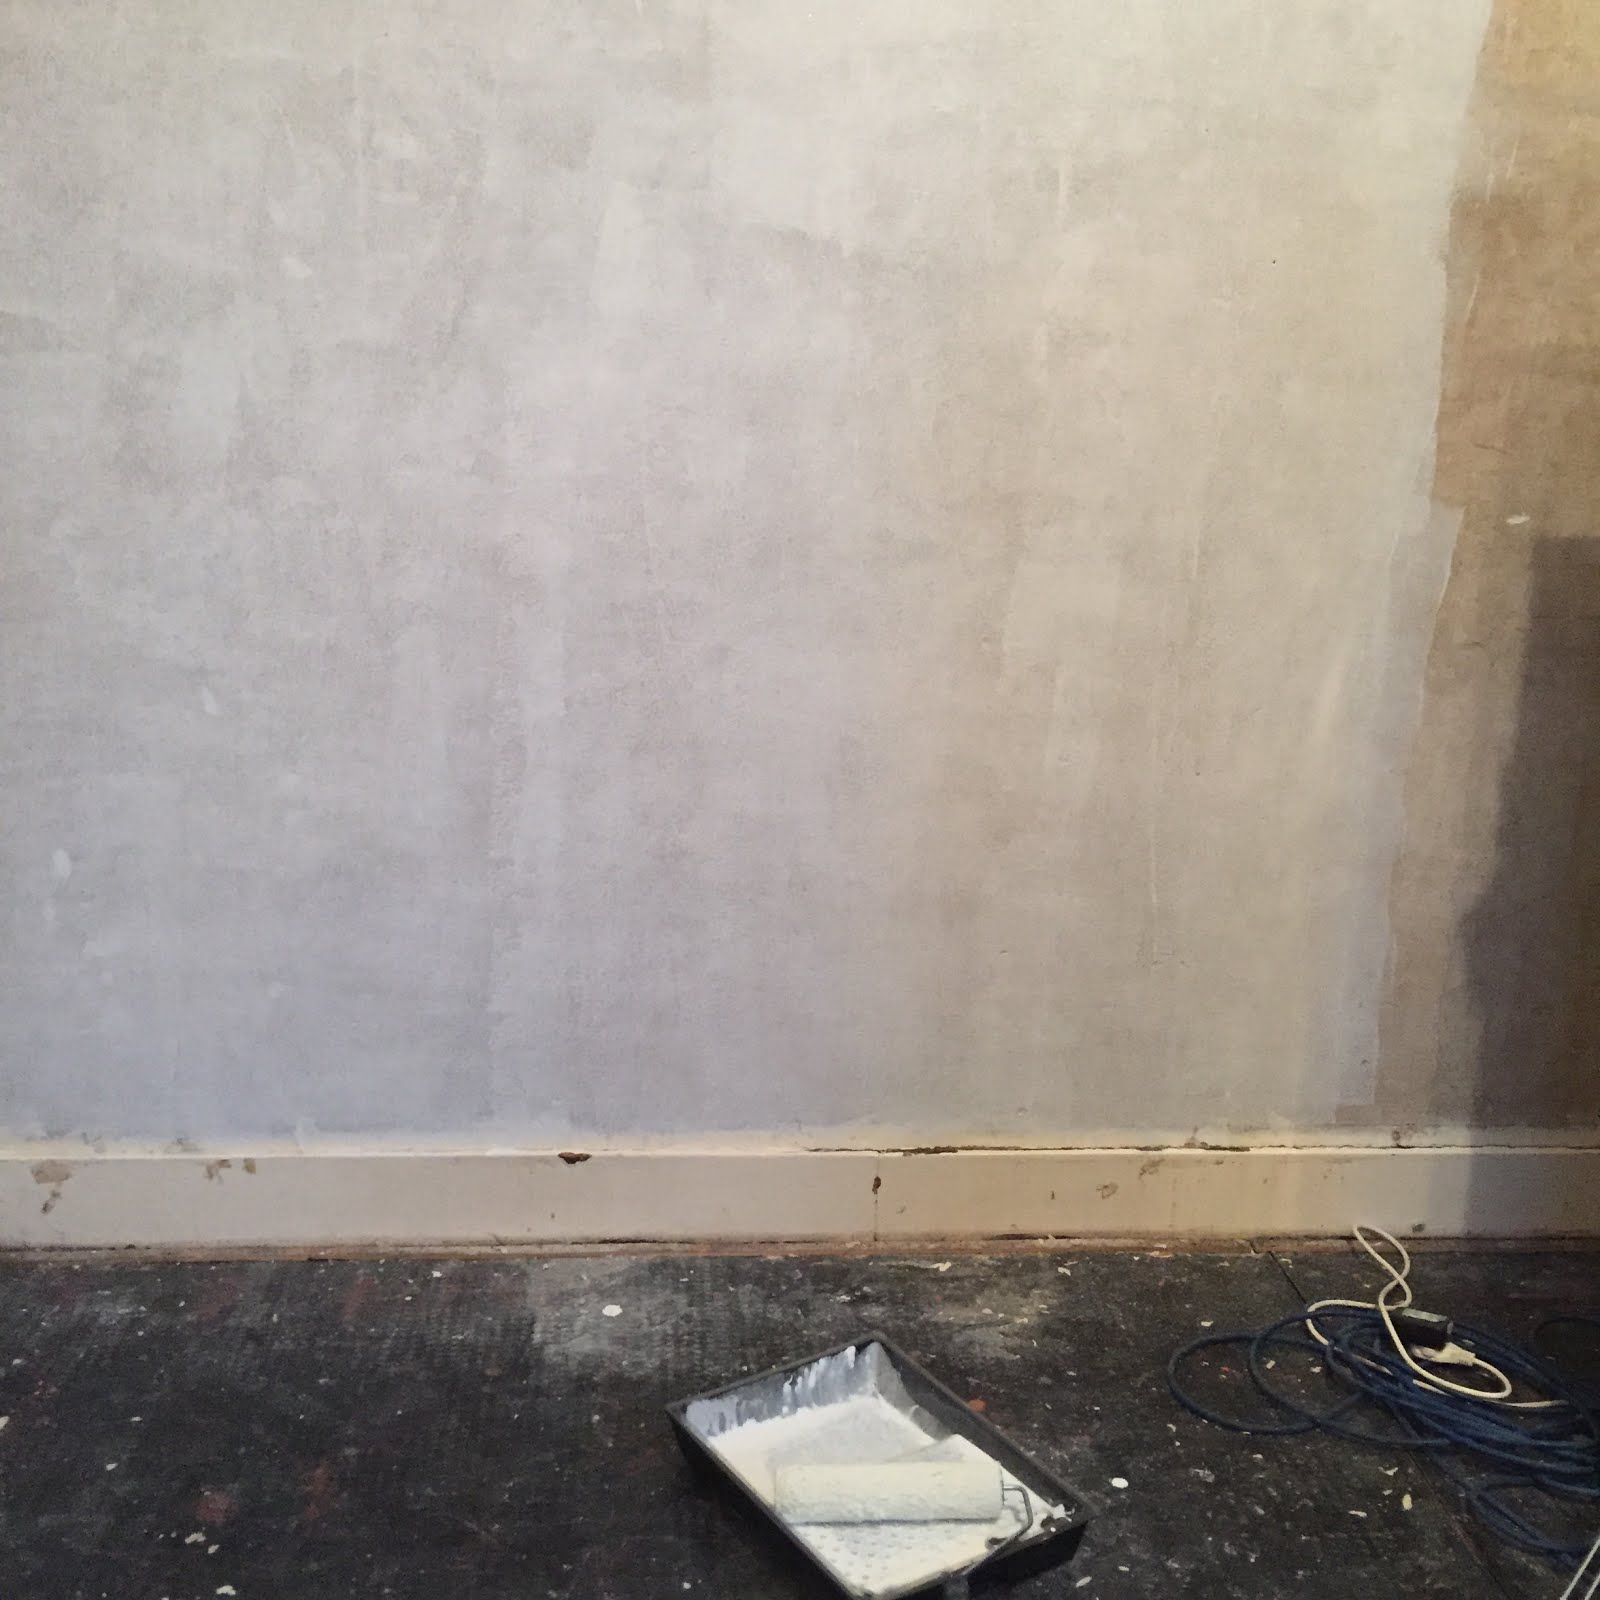
In order to carefully remove old skirting boards without damaging the walls, you need to take your time and very carefully pry the boards off the wall. This means getting a crow bar (we tend to use a flat head screwdriver to start with!) into the top of the board and very gently wiggling it to loosen the board from the wall. You want to work your way along the board doing this, in order to loosen each nail. If you go all in and try to remove the board from the first point you get your crow bar in, then you'll either bring half the plaster down with the board, or you'll snap the board in two - not ideal if you intend on reusing it! Old victorian skirting boards are attached to the wall with big old nails into wooden slats which are sandwiched between brickwork. As a top tip for removing old victorian skirting boards and attaching new ones - I recommend is leaving the wooden slats in the walls. These will actually be highly useful for re-attaching new boards. If you're unable to remove the nails without wrenching the wood out the wall, you can quite easily break the exposed part of nails off, leaving the rest of it in the wood. These kind of nails are very easy to break, just give it a gentle up and down wiggle with some pliers and they'll snap right off. 

To fit our new skirting, we're both gluing and nailing it into place. The glue will hold it in place, but the nails will ensure a nice tight fit against the wall - which especially can't be achieved with glue if you have any slight curvature in your walls. Old walls are very rarely perfectly straight, so nails are usually always a must - and if you've left the little wooden slats in the walls, you can use these to re-nail into.

We left little marks on the wall to show where the slats of wood are - so when it came to nailing the new piece of skirting we were able to correctly position these nails. If you've left the old nail in the wood and just snapped the top off, then do be sure to take measurements of its exact position so you wont be hitting the new nail onto it.
 

These MDF boards are already primed white, but I've given them a couple of coats of white eggshell over the top as well and then caulked any gap between the board and wall. And here it is, looking perfectly matched in the room against our old skirting boards. Obviously it's much crisper in its cut but as the old/new boards aren't side-by-side it's really not that noticeably different. Basically in blends in pretty well - just what I wanted! I'm sure you can tell which is old/new here - but you do have to actually really look to notice the difference from a distance. 

We also replaced all the skirting in the kitchen area, which was also mismatched (and massively rotten!) this time just using glue since we've re-plastered the wall and luckily it's quite straight anyway. 


Our tiles aren't perfectly level so there is a bit of a gap underneath the skirting - but it's really not noticeable due to the chair being in front of it. If you can't quite get a perfectly crisp join at the corners - I recommend adding some caulk here too. It'll give you that perfect crisp edge and once painted, you'd never know! 
We also added some new skirting to the chimney breast - which you may remember was covered in 70s brickwork originally, so sadly missing its skirting. This time we've scribed it around the hearth and painted it dark to match the wall. 

So I think these boards are a pretty amazing match and I've even bought some more lengths for the conservatory as well. I'm a huge fan of keeping the originals if you can - but if you need to replace any, then I definitely recommend checking out Skirting World for their massive variety of boards and of course, they can even do or bespoke designed ones too. I would absolutely always recommend MDF boards over pine too - I'm seriously never going back. In terms of costings, I was pretty surprised at how much they cost. I always thought MDF wasn't worth buying as it's vastly more expensive, but a full length of 3m board cost £13 in the size we needed, which I personally thought wasn't too bad. Smaller heights are much cheaper, but of course if you need a lot then that does very quickly add up - another reason why we like to keep the originals. But it's definitely well worth the money for its quality and if you're as picky as I am about matching old boards to new ones. I'd love to know your thoughts on keeping old rugged skirting boards and whether you've ever had to match new for old too? *I was gifted one length of skirting board in return for a blog post. However I loved it so much, I went back and ordered more with my own cash. Thank you for supporting the brands who support this blog! from http://www.kezzabeth.co.uk/2018/01/matching-period-skirting-boards-with.html 
I seriously uuhhmmed and ahhhed about whether or not I wanted to do another costing post this year. Partly because I didn't keep a track of finances in the same way I did before (aka - it's all been a bit messy!) and partly because I feel like we've somehow overspent on the DIY considering we haven't done all that much. But non-the-less, I'm keeping the traditions and going to share our total costings. So here we go, calculators at the ready!
So as I've said before, I like to share the full reality of our renovations - how much it's costing us, as well as how much stress it causes or how much work it involves. A large part of renovating is spending money - so to me, it makes sense to share that too. And I also hope it helps others realise how far (or not so far!) your money can go in the world of doing up your home, DIY-style.
You can see our 2016 costings here and our 2015 costings here.
As for 2017... Well, here we go:
Total Spent on Materials: £1115
(includes items like plaster, plasterboard, screws, paints, timber, sanding sheets etc)
Total Spent on Tradesmen: £0
Total Spent on Fixtures, Fittings & Appliances: £4099
(includes kitchen units, worktops, handles and kitchen appliances)
Total Spent in the Garden: £228
(includes decking oil, screws and timber etc)
Total Spent on DIY Tools: £237
(includes saw, drill bits, distance measurer etc) Total Renovation Cost for 2017: £5679
Other Furnishing Costs: £151
(includes table, rug, chairs etc)
Yiiiiiikes. That's still a preetty chunky price tag IMO. We managed to keep costs down by not having any tradespeople in at all (hurrah!) although the cost of an actual kitchen, worktops and new appliances really took the bulk of the cost. Kitchens are never cheap, so I guess it was kinda to be expected, although I still think we got a fairly good deal on the kitchen, especially considering the quality of it and having solid timber doors too.
We spent quite a bit on new appliances this year and whilst this wasn't "essential" our old appliances were well and truly out of date, used and abused. Our old fridge/freezer was quite small and the washing machine made all kinds of odd noises. We decided not to go down the secondhand route for either of those and we didn't go for the cheapest of the cheap either, but they were all non-integrated (minus the very cheap dishwasher) so we'll never have to leave them behind, should we ever move. Hopefully a worthwhile investment!
As for everything else - we didn't spend have any other dramatic buys, just a fiver here and there which soon adds up. The only major tool we bought this year was the Plunge Saw, which amounted to almost half the Tool spending. We used it on all the end panels, the worktops and have since used it a few times on other DIYs as well - definitely a good buy, that one!
This year we also used up all our renovation savings (the money we had put aside from the sale of our previous house), and the loan we took out almost 2 years ago is also now long gone. So from here on out, we'll be surviving on our monthly disposable income for renovating - which isn't a great deal in honesty, however we have now tackled both the kitchen and the bathroom, so hopefully costs should be massively cheaper!
Most Expensive Purchase of 2017:
£2521 Kitchen Units - kinda expensive but I know lots of people who have spent muuuuuuch more, so I feel kinda good about the amount we spent. It will have more use than a car after all!
£780 On Appliances - expensive for sure, but much required as well.
Most Bargain/Discounted Purchase:
£24 Hallway Table from eBay was absolute steal. The sellers brought it with them all the way from New Zealand so it's truly a one-of-a-kind table. It's made from solid wood, in immaculate condition and basically a total total bargain!
So that's this year costings round-up! I can already hear 2018 calling for my money dammit! Watch this space for more expensive (and not so expensive!) renovation updates :)
from http://www.kezzabeth.co.uk/2017/12/2017-renovation-total-spend.html 
I can't quite believe it's 2018. I feel like I say this every year - but how does a whole year go by so fast?! With a new year, comes new goals - and every year I like to lay out a proper plan to what I'd like to achieve. It doesn't always go to plan, but y'know, my intentions are good. And you never know - maybe one year I'll accomplish a whole list!
So there's not much else to say other than, here's what I have planned for the next 12 months....
Total Renovation of the Living Room
This has been SUCH a long time coming project!! We've lived in this house over 3 years now, would you believe?! And our living room hasn't changed one bit - well, except half the carpet is missing. But other than that, it's exactly the same - curtains and all. We currently don't really use this room as it's so freaking cold; the window is draughty (you can literally see the curtains blowing with the wind) and of course we have no heating either. Not to mention it's just ugly and un-relaxing to be in. So the plan is to completely renovate this room - rip off the wallpaper, sort the ceiling, expose and renovate the gorgeous wood around the window (currently swamped by the curtains), fit an open fire, sand, paint and basically make it a living we want to actually be in. Here's a little sneak peak of its current state.. 
Build A New Dining Table
I've been saying I want to do this for ages, but with 1000 other projects to do, it keeps getting pushed further and further down the list. But this year, I'm tackling it. The existing table simply doesn't fit with the chairs - the legs of the chairs literally don't fit underneath and they all collide. I specifically bought the chairs for this room so we'll be swapping the table for a self-built one made from scaffold boards. I think it'll fit the space much better and hopefully fit the style of the room a little bit more too. A matching bench for the far side of the table (near the log burner) is also on the cards as well!

Decorate the Conservatory & Add Seating
Last year we plastered the conservatory and painted the floor - but we never got round to decorating it in any other way. I already have a paint colour for the wall selected, so hopefully we can get our arses in gear and have that ticked off fairly soon. I've also collected some materials to build an indoor pallet seat with built-in storage as well, so that'll be the next big thing for this room. Other than that, it need a few more plants (you can never have enough!) and maybe the odd cushion or three to make it feel a little more homely. The idea for this room is to bring the outdoors in - a kind of summer room filled with greenery and space to relax.

In the Garden
Last year we built some scaffold decking (DIY tutorial coming in the Spring!) but we never actually finished it completely. So that's a first to-do must! I'd then like to build a garden dining table, which I have a really good idea for (although I won't share just yet!) and I'd also like to sort out the non-existent paving around the pallet sofa/firepit area as well. This one has been on the list for the last couple of years, so who knows whether we'll actually get it ticked off this year! Sneak peak at the not-quite-finished decking:

Begin Basement Renovation
Finally, we'd like to begin the basement renovation. It's the next 'big room' on the renovation list and it needs fully gutting, new electrics, plumbing the whole lot. I have no intention of finishing the room this year, but I'd jolly well like to make a start on it. We shall see!

So that's this years short but sweet to-do list. I haven't quite managed to complete a whole list yet, but I'm certainly feeling good about this year. With the kitchen and bathroom out the way, things can only get easier right?!
What's on your 2018 to-do list?!
from http://www.kezzabeth.co.uk/2018/01/renovation-goals-for-2018.html 
I've done one of these posts for the last few years - a 'looking back' on the year behind us and what we've achieved within the home and our renovations. This year we haven't tackled a great amount of stuff, but the things we have done has seriously improved the house and how we use it. Last year we didn't even have a kitchen and we were surviving solely with the outside garden tap at our only downstairs water source. I'm pleased to say things have changed greatly over the last 12 months and we've now officially ticked off the two major renovation jobs within the house. So - here's what we've achieved... Finished the Kitchen
We actually did it! 18 months (and more) in the making and the kitchen is well and truly ticked off the list! Albeit with a few finishing bits here and there, but who's counting those really? We spent NYE 2016 plastering and by the end of January we had actual kitchen units on order. Although it wasn't until the end of summer that we had all the worktops in place (major budget issues!) and the DIY kitchen fitting was complete. Buttttt we got there eventually and we now have a kitchen! It looks so bloody different from where we were last year, it's actually unreal.


Repaired Rotten JoistsOne of the second biggest DIYs this year was repairing the rotten joists of the dining room. It was a job and a half, involving supporting the floor, re-bricking parts of the wall and praying we'd done it all right. Full information on what we did and how here, but this was definitely a job we were both very proud to have done ourselves! It hasn't made any visual difference to the room, but we can now rest assured the floor wont fall in ;)

Renovated the Dining Room
The dining room has also been finished, HURRAH! Earlier this year we repaired the rotten joists, sanded floorboards, did yet more plastering, built a log stack, painted and finally it began looking like an actual room. We now have somewhere to sit, eat, and be warm. What joy! We'll be updating the table in the future, but it's looking so much better this year.


Built Decking
I haven't written about this on here *yet* because it's not quite finished. But we have in fact built some decking! It was on the to-do list for this year, so I'm pleased we finally got it done and here's a little sneak peak. Don't worry I'll do a full DIY post on how it's built this Spring ;)


Updated the Inner Hallway Porch
I was really lucky this year to be sent over a box of Karndean Loose Lay flooring to try out, so it was the perfect time and place, to do a little inner hallway porch update. We fitted the new floor (which I totally love!) and painted over the old ugly wallpaper. I even gave the door a little new paint job too (although I'll be writing about that one soon). It's definitely not 'renovated' but it's looking a bit better that's for sure!


Painted a Pattenered Floor
The conservatory wasn't on the original 'to do' list, but with windows from the kitchen looking into it - it was a room that was basically an ugly room that was kinda ruining the nicely finished kitchen. We cleared it out completely and began looking to do a budget makeover - starting with the floor. And what's more budget than paint? I created a whole DIY patterned floor, which I'm over-the-moon with and I think looks pretty darn good too!


So that's basically it for 2017! We didn't get that much done in the way of numbers, but finishing the kitchen was a pretty big job and definitely one I'm glad to see the back of too! We have way more planned for 2018 and I'll be sharing all that very soon, so watch this space. What's your biggest home achievement of 2017? from http://www.kezzabeth.co.uk/2018/01/12-months-of-renovations-what-we.html 
Christmas is such a strange but awesome time of year. Strange because it's the only month where spending heaps and heaps of cash is considered totally normal and acceptable. And awesome because there's such a cheery atmosphere everywhere - with carollers on the streets, gatherings and jolly (if a tad annoying) upbeat songs. Everyone's a little happier (OK, not everyone!) but it feels festive and it feels good.
This will be myself and Grant's ninth Christmas together, believe it or not! That makes me sound all kinds of old, although we've been together since I was 18 and lived together since I was 19 - so you can do the math ;) We've spent most of our lives together living in amongst chaotic homes whilst DIY Renovating - so this will only be our third Christmas together in a kitchen that isn't half destroyed or half falling apart. That makes us sound absolutely mad, I know.
Our lives have been very tough at times. Renting at 19 whilst both working minimum wage jobs is nothing school or sixth form prepare you for, and we've worked bloody hard to have what we do now. We're living in our second home and whilst we still don't have central heating (two houses, six years and counting!), we do have ridiculously posh (albeit very budget!) underfloor heating, a log burner and a beyond dreamy kitchen. I would literally never have imaged I would live in a house with little luxuries like this. It's incredibly different from our last house.
This house is obviously very much still unfinished, but we do now have a little area (actually it's quite big!) of bliss away from all the chaos. We have a kitchen; one with an oven, so much storage space I don't know what to do with it all, a dishwasher (thank the lord for our first ever dishwasher!!) and a fridge freezer that's actually big enough to hold food that'll last more than a few days at a time. I'm beyond excited for Christmas this year! And guess what? We have a tree too! 
Yes we do! You'll remember last years tree maybe? It was made out of bricks and sticks, literally. We had no counter-space, nowhere to prepare food, nowhere to wash pots - it was a Christmas feast disaster. In fact, we didn't really do Christmas at all. We had a budget each of £5 for one another's gifts and we cooked a frozen ready-meal kinda dinner. We didn't decorate, we didn't watch a single movie - the spirit was well and truly non-existent. So this year is total turnaround! 
Having gone from zero pounds, to a little, to a little bit more, to now almost average - I truly appreciate every pound we have and every pound we spend. And as I've got older, I care less for the smaller "stuff" in life. You'll notice our house is fairly minimal in that way! There's such a desire to own stuff and it can really easily end up owning you. The need to buy is addictive and it's so easy to fall into a pattern of constantly needing and wanting more; essentially making you need to work more. Whilst Christmas is fab in so many ways - a lot of it, is about buying stuff. In fact, it kinda demands it of you. The idea of gifting is lovely; a gesture to show you care, spoil someone you love - but let's face it, you end up having to gift to everybody like some of requirement. Distant relatives, colleagues, neighbours, even blooming' teachers, I hear! It's bonkers. The whole giving/receiving cycle literally forces you to spend more and more and quite often, it's either pointless tat or copious amount of chocolate. Or at least, that's my experience.
For the last few years we've realised we'd rather not stress about having to save a wad of cash months in advance for Christmas. I hate the idea of wasting money on stuff for the sake of buying something. And stuff like overpriced chocolates just makes me feel ripped off (sorry!). I'm not saying we don't give - but we budget a very very small amount and we try to keep gifting massively under control. And that does include gifting to one another too! Sometimes, you just gotta tell people not to give! And there's other ways you can give at Christmas, rather than buying stuff too. Can anyone else relate? Do you think gifting has gone a tad OTT? (Obv, I'm talking about adult gifting here - presents for kids is a bit different!) 
Our traditions at Christmas are pretty simple. We buy one tree decoration each, every year. (This year we cheated and bought a further two at a Christmas Market in Poland - but I figured we didn't buy any last year, so it was okay!) We have a chicken, not turkey; it's cheaper and there's only two of us anyway! Grant cooks, I drink lots of sparkling wine. We usually play a board game of some kind, watch a couple of movies and then we'll most likely pass out from a food coma around 8pm. It's nothing crazy exciting - but Christmas just has that festive feel that makes it more special. And of course, we get a day or two off - so that's always a bonus! We haven't gone overboard on the home decorating this year - as always, our money is needed elsewhere on plasterboard and the like - but I did manage to make a couple of DIY decorations instead. Unfortunately, I didn't quite get round to posting about them on here, but maybe I'll do some similar ideas for Valentines/Easter instead with a tutorial. Here's a sneak peak at one though: 
With just a few sleeps to go, I wanted to wish you all a super awesome day! If you're in the middle of a renovation and 'not feeling it' this year - firstly I totally get it(!!) and secondly just remember 12 months from now and it'll all have been worth it!! I also wanted to say thanks to every person who has visited this blog over the last year, commented, sent me messages, even followed me on Instagram. I've receive a massive amounts of hits on the blog this year, which is ironic considering this is the year I've written the least amount of content! But there ya go! In the spirit of 'giving', I also wanted to say, please remember to spend a little and give to those who are in need this Christmas. There are people in the UK still homeless, people still battling illnesses where there isn't a cure, children without parents, and suffering in all other kind of ways. I think it's so important (always - but even more at Christmas!) to show you care to the causes that mean the most to you. It helps real-life people and gives far more joy than just a short-term thrill of a gift at Christmas. When people are literally walking about with pocket-fulls of cash ready to spend and "give", why wouldn't you? Merry Christmas and have a fabulous day, Kezz X from http://www.kezzabeth.co.uk/2017/12/christmas-in-a-renovation.html |

AuthorHi I am Jaclyn Ross 28 years old and I am a project manager for a construction company we install basements and do central ac as well as insulation. ArchivesCategories |

 RSS Feed
